In this article, I’ll share my experience building a Proxmox homelab leveraging Proxmox Virtual Environment’s free version. I’ll share the hardware and network setup, as well as touch on some of the virtual machines hosted in the lab right now.
A Brief Homelab History

During the height of the pandemic, I purchased a used Dell PowerEdge R720 rack mount server with 2 Intel Xeon processors and 64 GB of RAM (I recently upgraded to 128 GB of RAM after one of the original DIMMs failed). Over a couple pay periods I then fleshed it out with disks, resulting in a 500 GB partition and a 2 TB partition. Initially, I installed CentOS 7 and ran a simple KVM (Kernel-based Virtual Machine) platform. Using this, I was able to setup and experiment with things like Nexus for a local Python package repo and a PXE environment for building various Linux distributions from Kickstart files. I even admittedly mined Ravencoin with the Xeon processors for awhile (still waiting on Ravencoin to go to the moon!).
A Homelab Hiatus
In 2021 when we moved to our current home, I placed the server, nestled precariously in its 12 U rack without rails (aka lying on the bottom of the rack diagonally), in the basement and left it powered off. A year later I powered it back up as it sat and staged some Developer licensed RHEL 8 virtual machines to start prepping for the RHCSA exam (read about my recent success here). After a couple of months, I powered the server down again.
Rebirth as a Proxmox Homelab
In direct relation to my recent reawakening, I felt the compulsion to rebuild my homelab from scratch. I wanted to evolve past KVM on a RHEL-based distribution and explore another virtualization platform option. Being a “Linux guy”, I wasn’t enthused about Hyper-V, and anything VMware is out of the question due to licensing requirements.
Proxmox Virtual Environment has a very VMware ESXi-esque familiarity to it and offers some desirable features that almost make it enterprise-ready, like clustering, command-line interface (CLI), high availability, and even a mobile app for managing. It is still based on KVM, so it’s not a completely new technology stack, but it has a lot of additional, very useful features included.
A Detour to Touch on Homelab Networking
At this point, I need to explain that there is no network cabling from my basement to my router in my first-floor office. One of the reasons I’d been so slow to get anything going with my homelab in this house was that I couldn’t get a Wi-Fi dongle to work very well with all but a few Linux OSes installed directly on the server. In the case where I was able to get one to work with PopOS, the data throughput was criminally slow due to signal strength between my router and where the server rack sits in my basement.
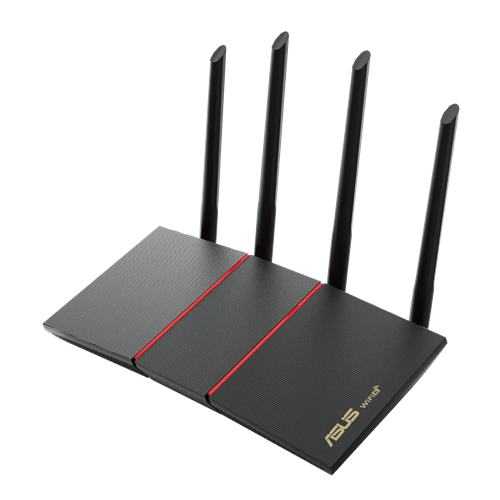
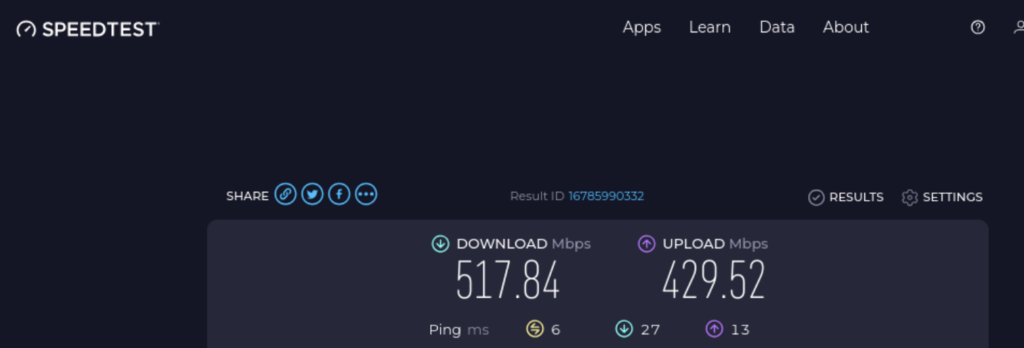
Enter the ASUS RTX-55U. I was able to find a lightly used specimen on eBay for less than $60, shipped. My primary router is an ASUS RT-AX88U with AiMesh. AiMesh is a technology that makes it easy to scale out a home wireless network. The RTX-55U, configured as an AiMesh node on the RT-AX88U, extends my wireless network into the basement. Where it is installed, a mere 4 ft below the primary router’s location in the office on the first floor, data throughput on wireless is adequate for now. Below are the results of an internet speed test from a VM on the Proxmox host:
Back to the Proxmox homelab server
The bare-metal installation of the Proxmox Virtual Server was straightforward. I downloaded the ISO file and wrote it to a USB thumb drive, then inserted it into one of the server’s USB slots. Then I had to get into the BIOS to enable booting from USB on the R720, but once past that point, things just worked. I won’t detail the installation process here, as it is well documented by Proxmox and many others, but read on for some post-install customization resources.
To manage the Proxmox host after installation, I needed to be able to connect to it from a web browser on port 8006. The server console displayed the full URL, so I made a note of it. From this point forward, I no longer required direct physical access to the host, so back upstairs I went.
Proxmox VE Post Install
Some of you may already be acquainted with the Proxmox VE Post Install script. For the rest, I recommend checking it out. I encourage you to review and understand what the script is doing prior to executing it, as a standard best practice. For me, it checked all the boxes I wanted on a clean Proxmox homelab installation. I copied the command provided in the link into the Proxmox host’s console and executed it successfully, with no observed ill effects to date.
Homelab Experiments
Many of my experiments have been ephemeral in nature, wherein a virtual machine is provisioned, a use case is exercised, and then the virtual machine is purged. However, I do have some longer-lived VMs that I keep patched and running. You may see additional posts on these in the near-future.
Pi-Hole
Pi-Hole is a DNS server that primarily blocks unwanted ads by sending DNS queries for known ads and malicious networks to a black hole. It can run on Rasberry Pi, and a few other operating systems. With the Pi Zero 2 W I have, I’ve seen reports of – and personally experienced – issues with the Wireless connection dropping out. DNS stability is too critical to attempt on a flaky wireless device. I also have a Pi 3B+, but it’s currently serving as a DAKBoard display.
That leaves the Proxmox Homelab as the only remaining option that doesn’t require additional equipment purchases. Even though it’s on a wireless connection, it’s much more stable than the Raspberry Pi Zero 2 W, and I configured my router’s IP as backup DNS, in case the Pi-Hole DNS server becomes unavailable for some reason.
Windows Server 2022 Core
While I prefer Linux, I’m not fully anti-Microsoft. I have written PowerShell scripts when the opportunity presented itself. Throughout my career, when I’ve administered Windows servers, I’ve had the full GUI to rely upon. For this VM, I’ve registered it with a 180-day evaluation license, and installed Server Core, which is “the recommended installation option. […]It is used for “headless” deployments which are managed remotely through Windows Admin Center, PowerShell, or other server management tools.” (1)
I’m flexing my PowerShell skills and evaluating Windows Admin Center at the same time, while also testing how suitable Proxmox VE is for hosting Windows VMs.
Conclusion
While this summer saw a lot of activity in the Proxmox Homelab, lately I’ve been occupied with my first Fiverr Gig, and a complex and time-sensitive project for my primary employer. The R720 is about 10 years old, and while it’s still plugging away without major complaints (aside from the recent memory DIMM failure mentioned above), I’m considering options for a companion and/or replacement for it. I’d like to expand to a two-node cluster and incorporate a separate NAS device for backups, and additional storage needs soon.
Do you have a Homelab? Do you use Proxmox? What projects or experiments have you enjoyed? What have you regretted? Comment below!